The fastest way to improve
Forget secret weapons and perfect rooftops. Better Ground War tips and tricks start with one repeatable habit: move to cover, listen, expose one angle, take one fight, then relocate. Stay visible after an elimination and somebody else in the 16v16 lobby will usually answer.
A good push is not the one that travels farthest. It is the one that keeps giving you safe choices. A route with cover, an escape, and a useful view of the objective beats an exposed shortcut.
Match rules, weapon balance, and map layouts can change. Check the live mode card and arsenal on September 10, 2026 or later before treating any old score target, price, or ranking as current.
Use the cover-to-cover loop
New players often treat cover as a place to stop. Think of it as the next link in your route.
- Pick the next cover before leaving the current one. A wall, vehicle wreck, container, building edge, or terrain break is a destination, not decoration.
- Cross while enemy attention is elsewhere. Teammate fire, a passing vehicle, or a fight on another lane can give you an opening.
- Expose one angle at a time. Do not stand where a rooftop, road, window, and objective can all see you.
- Fire a controlled sequence. Correct recoil, confirm the target is still exposed, and stop if the angle disappears.
- Move after contact, even when you win. The defeated player and nearby enemies now know your position.
The same habit works at every range. It gets a close-range player into a building without feeding a sniper, lets a rifle hold the edge of a street, and keeps a sniper from becoming a stationary marker after the first shot.
Let sound narrow the battlefield
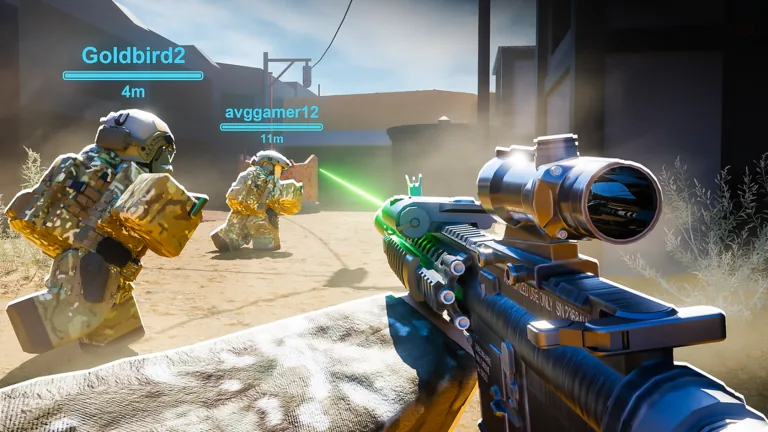
Ground War is visually busy, so your ears can remove some uncertainty. Footsteps and gunshots are especially useful warnings in close or enclosed areas.
Use sound as a question, not a command. Hearing footsteps does not mean “rush this corner.” It means:
- stop making unnecessary movement noise;
- check whether an ally is close enough to explain the sound;
- aim at the most probable doorway, container gap, or stair route;
- keep an exit behind you;
- wait for a clearer cue before committing.
Gunshots give different information. Their direction tells you where a fight is active, while their rhythm can hint at whether an enemy is still engaged. Use that window to approach cover, support a teammate, or bypass the lane. Do not sprint toward every shot. A large match creates more fights than one player can safely join.
Choose fights by range
Each gun has its own handling and bullet behavior, and the community-maintained reference notes that players need time to learn differing bullet drop. Instead of forcing one aim style everywhere, define the range where your current weapon is controllable.
| Situation | Better decision | Common losing decision |
|---|---|---|
| Tight container or building route | Enter with a close escape and pre-aim likely corners | Reload in the doorway or chase around a blind corner |
| Medium street or yard | Fire from a cover edge and correct recoil in bursts | Stand in the road and hold the trigger |
| Long open sightline | Use a stable position briefly, then change angle | Repeat shots from the same uncovered rooftop edge |
| Enemy outside your weapon’s range | Mark the threat mentally, break sight, and reroute | Spend a full magazine hoping for a low-control elimination |
| Vehicle controls the lane | Leave the lane or use an appropriate counter-role | Peek the same armor from the same infantry position |
Range discipline also protects your Cash progression. Consistent eliminations support leveling; repeated low-probability duels mostly return you to spawn.
Play Team Deathmatch as a life economy
Team Deathmatch rewards eliminations and punishes careless deaths. Use this rhythm: contact, advantage, finish, reset.
Contact
Enter a lane with cover already selected. Look for teammates firing in the same direction. A teammate is useful not only because they add damage, but because enemy attention cannot remain on both of you equally.
Advantage
Fight when you have one of three advantages: the first accurate shot, stronger cover, or a range that suits your weapon. If none is present, move. You are not required to accept every duel that appears.
Finish
Do not chase an injured enemy through two unknown angles. Finish only when the route remains controlled. Otherwise, hold the exit they must use or shift to another useful target.
Reset
Reload behind cover, check the opposite flank, and move a short distance. A reset prevents the common pattern of winning one duel and losing immediately to the response.
Play Base Occupation as an area-control problem
In Base Occupation, standing near the objective is not enough. You need to control the routes that allow enemies to touch it.
Use a three-ring model:
- The point: Clear it before entering, then avoid clustering with teammates in one explosive target.
- The entrances: Watch container gaps, streets, doors, slopes, and other routes that feed directly into the point.
- The approach: Interrupt enemies before they gather into a full push, but stay close enough to return when the point is threatened.
City and Dock are objective-focused environments. City emphasizes exposed roads, elevation, and routes between control areas. Dock uses containers and narrow gaps that make short-range ambushes more important. Treat those details as orientation, then confirm the current map during the live vote and deployment screen.
If a capture does not move as expected, do not stare at the gauge. Sweep the nearest concealment and approach lanes with a teammate. An opponent can deny control while remaining hard to see.
Position high ground without becoming an easy target
High ground gives you information and cleaner firing angles. It also attracts attention. Ground War maps have rooftops, towers, cranes, and other raised structures, and players learn to check the obvious perches.
Use high ground in short phases:
- arrive through the safest available route;
- scan the objective and the closest threats first;
- fire from a position that leaves most of your body covered;
- change side or level after contact;
- leave before opponents coordinate on your location.
A helicopter can create access to unusual positions, but landing skill, aircraft visibility, and the lack of cover can turn the same perch into a trap. Do not confuse “hard to reach” with “hard to shoot.”
Survive vehicles and their explosions
Vehicles change the geometry of a lane. Armor can pressure open ground, while helicopters can deliver players to angles that infantry routes do not reach. Your first counter is awareness.
When you see a vehicle:
- identify whether it is moving toward you, transporting players, or holding a firing angle;
- break direct sight before deciding whether to fight it;
- keep distance from damaged vehicles because destroyed vehicles create nearby explosive danger;
- avoid standing beside a friendly vehicle simply because it feels protected;
- use a launcher only when its intended target type and firing condition match the threat;
- move after firing so the crew cannot answer the same position.
Launchers can have different target restrictions: an unguided rocket, anti-air lock, and anti-ground lock do not solve the same problem. Confirm the current launcher description in the arsenal before buying or deploying one; prices and balance can move between updates.
Make teammates useful without stacking
Running alone exposes you to every angle. Standing directly on top of three allies invites one explosive hit. Stay close enough to trade a fight, with enough space that one burst or explosion cannot remove the group.
Watch what your teammates are already doing. If two players hold the same long lane, add value by watching the flank or moving one cover closer to the objective. If a vehicle is transporting players, let it create pressure while you take a parallel infantry route. If the entire team is sniping away from an objective, become the player who checks the capture lane rather than adding a fifth scope to the same rooftop.
A ten-second decision check
When the match feels chaotic, run this checklist:
- Cover: What stops the next burst?
- Sound: What threat did I hear but not see?
- Range: Does my weapon want this fight?
- Mode: Does this position help Team Deathmatch survival or Base Occupation control?
- Vehicle: What can enter or explode near this lane?
- Exit: Where do I move after firing?
You do not need to answer all six aloud. Repeating the order trains you to notice the mistake before the death screen explains it.
Mistakes that slow improvement
- Returning to the exact angle where you just died. The opponent is already prepared for it.
- Buying around a community tier label. Test handling and check current stats before committing Cash or Robux.
- Holding high ground without cover. Visibility works both ways.
- Ignoring the mode. Eliminations away from an active point can leave the team losing the only area that matters.
- Treating a damaged vehicle as cover. Move away before it becomes the threat.
- Reloading on habit. Reach cover first unless the current magazine cannot survive the next fight.
- Sprinting through every sound cue. Slow down, locate the route, and make the approaching enemy expose first.
FAQ
What is the best Ground War tip for beginners?
Choose your next cover before moving. That single habit reduces exposed deaths and gives you a stable place to aim, reload, listen, and decide.
Should I always play near teammates?
Stay close enough to trade fights and share pressure, but do not stack so tightly that one burst or explosion can hit everyone.
How should I change tactics between the two modes?
Protect your life and create favorable trades in Team Deathmatch. In Base Occupation, clear and defend the routes around active capture areas instead of watching from a distant lane.
Are rooftops the best positions?
They can provide information and long sightlines, but obvious rooftops attract enemy attention and often lack cover. Fire briefly, change the angle, and leave when the position is compromised.
How do I deal with vehicles as a new player?
Break sight first, identify the vehicle’s role, keep away from damaged vehicles, and check which current launcher or route actually matches the threat before engaging.