Use armor to create space, not just chase kills
Ground War tanks work best when they get infantry across open ground, pressure a defended angle, and move before enemy launchers settle in. Sit in one lane for too long and the vehicle becomes an easy target. Arrive, open a route, then change position.
This is a 16v16 large-scale FPS, so a vehicle belongs in the team fight. Give every drive a purpose. Carry players toward the useful side of the map, put armor between them and incoming fire, or make defenders turn away while your infantry pushes. If the vehicle is doing none of those jobs, you are risking it for very little return.
Vehicle balance is patch-sensitive. This guide reflects the game on September 10, 2026. Check the current spawn menu and vehicle indicators before trusting an older durability value.
Know what each ground vehicle is for
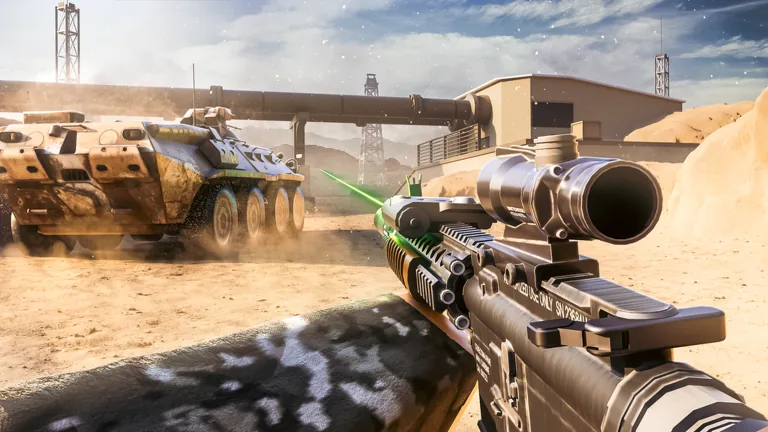
Players call almost every armored option a tank, but the Wasteland Buggy, Humvee, and BTR have different jobs. Check the seating, weapons, and durability shown in your current server before pulling away from base.
| Vehicle | What it does | Best assignment | Main risk |
|---|---|---|---|
| Wasteland Buggy | Fast two-seat transport with an extra rear seat | Rapid movement, pickup, and short flanks | Very light protection; one RPG or Javelin hit destroys it in the September 10 build |
| Humvee | Armed troop transport with a front .50-caliber turret and armor plate | Move a small group while adding direct fire | The gunner’s sides and rear are exposed; the two-RPG durability baseline can change |
| BTR | Armored ground vehicle present at the base | Protected movement, fire support, and mobile cover | Check its current weapons and durability in the live vehicle UI |
The choice is straightforward. Take the Buggy when arrival time matters more than protection. Pick the Humvee when a driver and gunner can work together. Use the BTR when the route is exposed and the squad needs armor, but learn its current controls before entering the fight.
Do not wait at spawn for a perfect vehicle while the objective collapses. Vehicles regenerate after destruction or after sitting unused for a period. A useful transport run now beats saving an idle machine for a fight that might never happen.
Drive with an exit route
A disciplined armor run has four parts.
- Choose your way out. Before accelerating, decide where you can reverse or turn if a launcher appears. A narrow road without side cover is a commitment.
- Check the crossing. Scan rooftops, windows, hill edges, and the corners around your destination. An RPG user only needs a clean angle.
- Push for one result. Deliver passengers, distract defenders, or cover a street crossing. Do not keep advancing just because the first ten seconds were quiet.
- Move after contact. Once enemies know your firing position, change the angle. Even a short move can spoil an unguided rocket or interrupt a ground-vehicle lock.
This matters most on long, open approaches. City roads leave room to maneuver, but a stationary vehicle is easy to track there. Sand Storm’s central structures offer approach cover, though driving straight into the middle can trap you between buildings and launcher users. At Dock, the container lanes let infantry get uncomfortably close before you see them.
Turn the vehicle into mobile cover
Armor can help infantry without firing a shot. Angle the solid side toward the dangerous lane, stop long enough for teammates to cross, then move. You are creating a safe side for a few seconds, not building a permanent wall.
Destroyed vehicles explode and damage players nearby. The blast area is narrow, but it can still kill anyone hugging the hull. Once a vehicle is badly damaged, it is no longer dependable cover. It is a bomb waiting for the next hit.
Use this spacing rule:
- With a healthy vehicle and no launcher pressure, infantry can cross along the far side.
- When rockets keep arriving or damage is building, spread out and get ready to leave.
- If the vehicle is disabled, trapped, or close to destruction, clear the blast area instead of crouching beside it.
- When an enemy uses your abandoned vehicle as cover, attack from range. Do not rush into the same explosion zone.
Never park across the route your teammates need. A wreck in that spot can block the push and punish the people you meant to protect.
Read the anti-tank threat correctly
The launchers have separate jobs. The RPG-7 is unguided and fires without a lock, so it punishes predictable routes and close corners. The Javelin must lock onto a ground vehicle. The Stinger is for helicopters, not tanks.
| Threat | What the attacker needs | Your best response |
|---|---|---|
| RPG-7 | A clear line and a predicted point of impact | Change speed and angle, break line of sight, and avoid tight corners at point-blank range |
| Javelin | Time to complete a ground-vehicle lock | Get behind solid cover before the lock completes instead of testing your durability |
| Small-arms fire | Sight of occupants or exposed positions | Turn vulnerable seats away and let infantry clear close threats |
| Destruction blast | A vehicle reaching its terminal damage state | Exit early and move away from the hull |
In the September 10 build, one RPG or Javelin hit destroys the Buggy. The Humvee can take one RPG but explodes on the second. Balance patches can change those numbers, so check the live vehicle state before loading a full squad.
Driving closer is not a good answer to an RPG unless your team has already cleared the shooter. At short range, guidance barely matters. The attacker can aim at the road or wall beside you. Keep your distance, use solid cover, and vary your timing.
Position for infantry, not against it
The driver sees the route. Nearby infantry sees the doors, alleys, and rooftops that the driver cannot watch at once. Each side needs the other.
The vehicle should cross exposed lanes, force enemies off a firing angle, carry players to the approach, and draw attention during a coordinated push. Infantry should check tight corners, remove nearby launcher users, protect an exposed gunner, and take the objective after arrival.
Stop behind cover when dropping passengers. Do not leave them on the objective marker or in the middle of a road. Give them a protected side to exit. Otherwise you have only delivered more targets into the crossfire.
Know when to abandon a damaged vehicle
Staying inside can feel like protecting an asset. Stay one hit too long, though, and the enemy gets the vehicle plus everyone caught beside the blast.
Get out when:
- the damage display shows that the next expected anti-tank hit will destroy the vehicle;
- you are stuck, overturned, or boxed into a lane with no way to break line of sight;
- repeated locks keep you from reaching useful cover;
- the driver or gunner can no longer do the job the vehicle was brought in to do;
- the objective has moved and continuing on foot is faster or safer.
Pick the exit side before leaving. Keep the hull between you and the enemy, move away at once, and do not let every passenger gather in one spot. Only reverse for a repair or reset if the current interface actually provides that option. Ground War does not automatically inherit repair mechanics from other Roblox shooters.
Common Ground War tanks mistakes
Parking on the skyline. High ground gives you a view, but it also exposes the entire vehicle. Peek over the crest, check or fire, then drop back.
Driving without infantry. A launcher user behind close cover can shoot before the driver checks every angle. Let teammates clear the next corner.
Using transport as a dueling tank. The Buggy wins races, not long anti-armor fights. The Humvee adds turret pressure, but its occupants still need protection.
Treating the wreck as safe cover. It explodes when destroyed. Start moving away while damage is building.
Repeating the same route. An RPG user only needs to learn your timing once. Change the lane, pause point, or approach after a failed push.
A quick vehicle checklist
Before leaving the base, ask:
- Is this run for transport, fire support, or cover?
- Who is watching for nearby launcher users?
- Where is the first solid cover?
- Which side will passengers exit?
- At what damage state will everyone leave the hull?
If you cannot answer the first three, wait a few seconds for infantry or take a safer route. Ground War tanks are strongest when the crew makes those decisions before the first rocket arrives.
FAQ
What is the best tank in Ground War?
There is no universal best option. Pick by job: the Buggy for speed, the Humvee for armed transport, and the BTR when the team needs an armored presence. Check the current spawn menu for live stats and equipment.
Can vehicles respawn in Ground War?
Yes. Vehicles spawn at the base and regenerate after destruction or after sitting unused for a period. Watch the current server for the exact timer instead of planning around an old value.
What launcher counters Ground War tanks?
The RPG-7 is the flexible unguided anti-tank choice. The Javelin is the guided launcher for ground vehicles. The Stinger targets helicopters.
Should infantry use a damaged vehicle as cover?
Only for a moment. Destroyed vehicles cause a lethal close-range explosion, so leave the hull once damage becomes serious or rockets keep arriving.
When should I leave a Ground War vehicle?
Exit when the next expected hit can destroy it, when it cannot reach cover, or when it no longer helps the objective. Leave from the protected side and move away from the blast area.